A little over a week ago an old friend from the
OLPC Learning Club DC, Kim Toufectis, dropped by our Thursday night
Code for NOVA meetup and we took to chatting about what's going on in the world of the free software education community. A group of us at the Code for NOVA meetup have been exploring the
Raspberry Pi. While admittedly a bit far removed from Code for America's civic hacking mission, the Raspberry Pi and the growing community around it are providing wonderful educational resources for learning to program in
Python, and learning to use and manage
GNU/Linux computer systems, both of which will be extremely useful for folks coming to our meetup wanting to acquire the skills they need to contribute to civic hacking projects.
From Raspbian to Debian + PIXEL
What Kim told me about that excited me the most was the recently released i386 port of the desktop used on the Raspberry Pi. I've been following the Raspberry Pi since I came home from Pycon 2013 with 4 of them. What makes this new port a potential game changer is that it would allow me to run the same desktop on both the computers in my classroom and on the Raspberry Pi's. This means that the Pi's amazing collection of educational resources could be used without change on my lab computers.
At present, i386 Debian + PIXEL is only available as a live image that boots from either DVD or USB. I want to be able to install it on the hard drive of lab machines, and indeed I have an old Dell laptop that won't boot from USB which has only a CDROM drive, so neither of the available options would work on this machine. I also want to be able to run it in virtual machines using KVM on my Ubuntu hosts. With the help of two resourceful students, I developed the following first draft of a process by which to do this.
Installing the Debian + PIXEL Desktop on a KVM Virtual Machine
1. Start with a base Debian 8 (Jessie) i386 install
I used a netinstall iso image, which is both really small and which provides maximum flexibility, as long as you have an available network connection on the machine on which you are installing.
Since I don't know yet which of the general option offered by the installer provide which specific software, I decided to deselect everything and use the minimal installation offered. I allocated 1 Gig of RAM, 1 processor, and 20 Gigs of virtual hard drive space to this machine.
2. Login to the completed virtual machine as root and run the following commands:
# apt install ssh sudo vim
# add user [username] sudo
# ifconfig
I got the IP address of the virtual machine from ifconfig, I used
ssh to connect to it from a
GNOME Terminal on the host machine, so that I could easily copy and paste the rest of the commands I wanted to run. Here is a screenshot showing the virtual machine running in the
Virtual Machine Manager and the GNOME Terminal session preparing to ssh into it:
3. Get the gpg key and setup the apt repositories. Run:
Arlington Career Center
$ wget http://archive.raspberrypi.org/debian/raspberrypi.gpg.key
$ sudo apt-key add raspberrypi.gpg.key
Then set the contents of
/etc/apt/sources.list to:
deb http://httpredir.debian.org/debian/ jessie main contrib non-free
deb-src http://httpredir.debian.org/debian/ jessie main contrib non-free
deb http://security.debian.org/ jessie/updates main contrib non-free
deb-src http://security.debian.org/ jessie/updates main contrib non-free
deb http://httpredir.debian.org/debian/ jessie-updates main contrib non-free
deb-src http://httpredir.debian.org/debian/ jessie-updates main contrib non-free
and set the contents of /etc/apt/sources.list.d/raspi.list to:
deb http://archive.raspberrypi.org/debian/ jessie main ui staging
# Uncomment line below then 'apt-get update' to enable 'apt-get source'
#deb-src http://archive.raspberrypi.org/debian/ jessie main ui
4. Install the PIXEL desktop. Run:
$ sudo apt update
$ sudo apt dist-upgrade
$ sudo apt install desktop-base pix-plym-splash
$ sudo apt install lxde dhcpcd-gtk
$ sudo apt install pi-greeter pi-package pimixer pipanel
$ sudo apt install raspberrypi-artwork raspberrypi-net-mods
$ sudo apt install raspberrypi-sys-mods raspberrypi-ui-mods
$ sudo apt install chromium
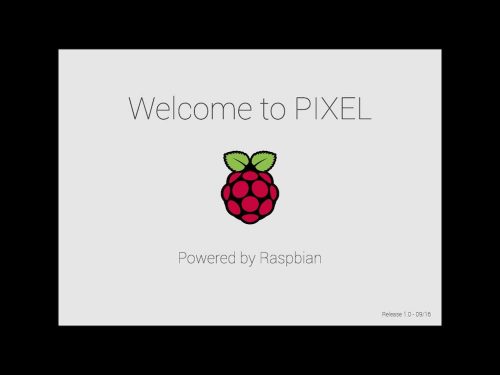
After this, I exited from the ssh session and rebooted the virtual machine, again accessing it through the Virtual Machine Manager. Here is what greeted me:
Logging in revealed:
After running
LXRandR and tweeking the
LXTerminal to my liking, I arrived at:
This is only a very rough process at this stage. The menus will require configuration to match what students see on both the Raspberry Pi and the Live image of Debian + PIXEL.
The next step for us at the
Arlington Career Center will be to reach out to the Raspberry Pi community and see if we can begin contributing directly to the project. The OLPC Learning Club DC was the most exciting user group in which I've ever had the pleasure to participate. It brought together an eclectic mix free software geeks, scientists, hobbyists, and parents with their young geniuses to be into the kind of gather that just leads to great things. I'm hoping that the local Raspberry Pi community we are beginning to create can at least approach the magic of that experience.


